Showing posts with label DotNet. Show all posts

Sunday, August 22, 2021

StoneAssemblies.MassAuth Hands-on Lab

A few days ago, I introduced you StoneAssemblies.MassAuth as a  Gatekeeper implementation.

Today, as promised, I bring you a hands-on lab that consists of the following steps:

  1. Set up the workspace
  2. Contract first
  3. Implementing rules
  4. Implementing services
  5. Hosting rules
  6. Build, run and test
So, let’s do this straightforward. 

Prerequisites

  • Visual Studio 2019 (16.9.3)
  • Docker (2.3.0.4)
  • Cake (1.1.0)
  • Tye (0.9.0-alpha.21380.1)

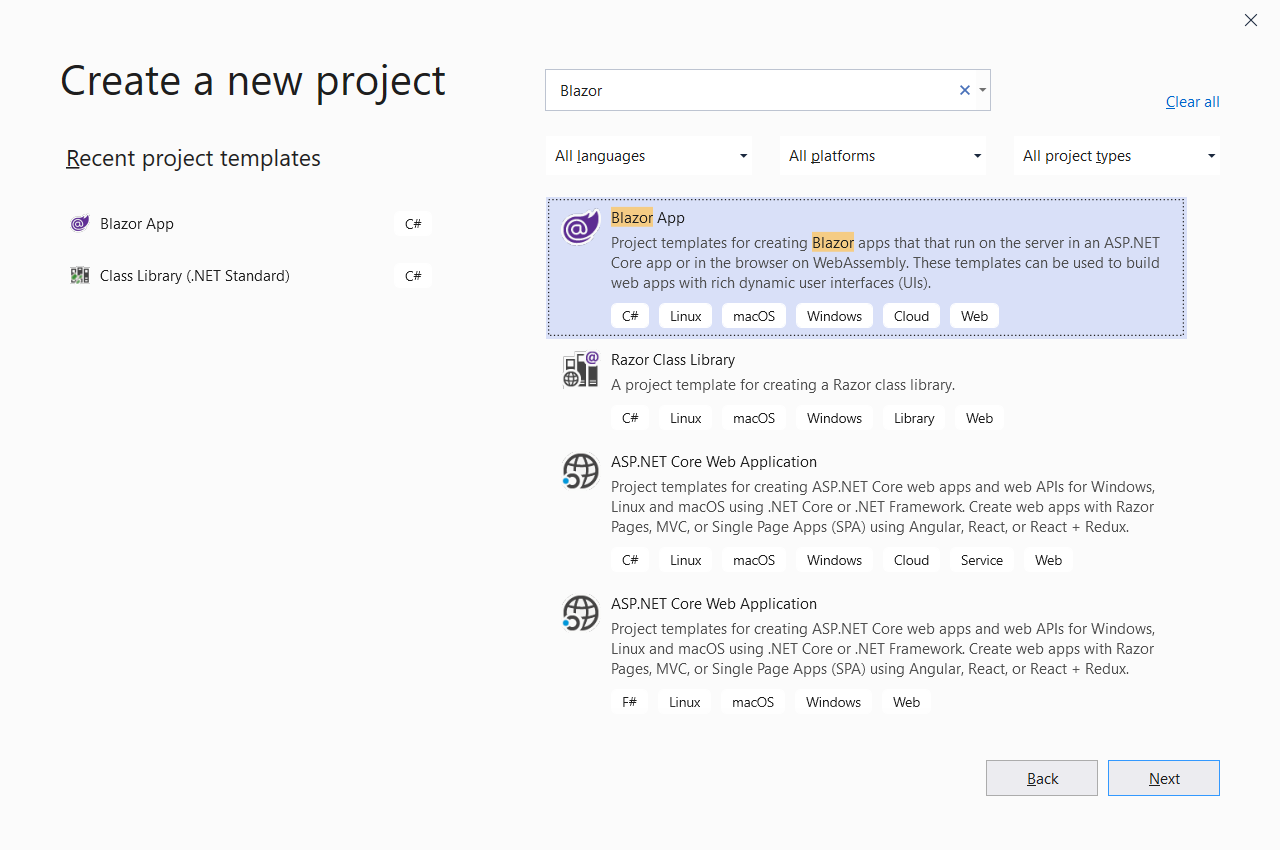
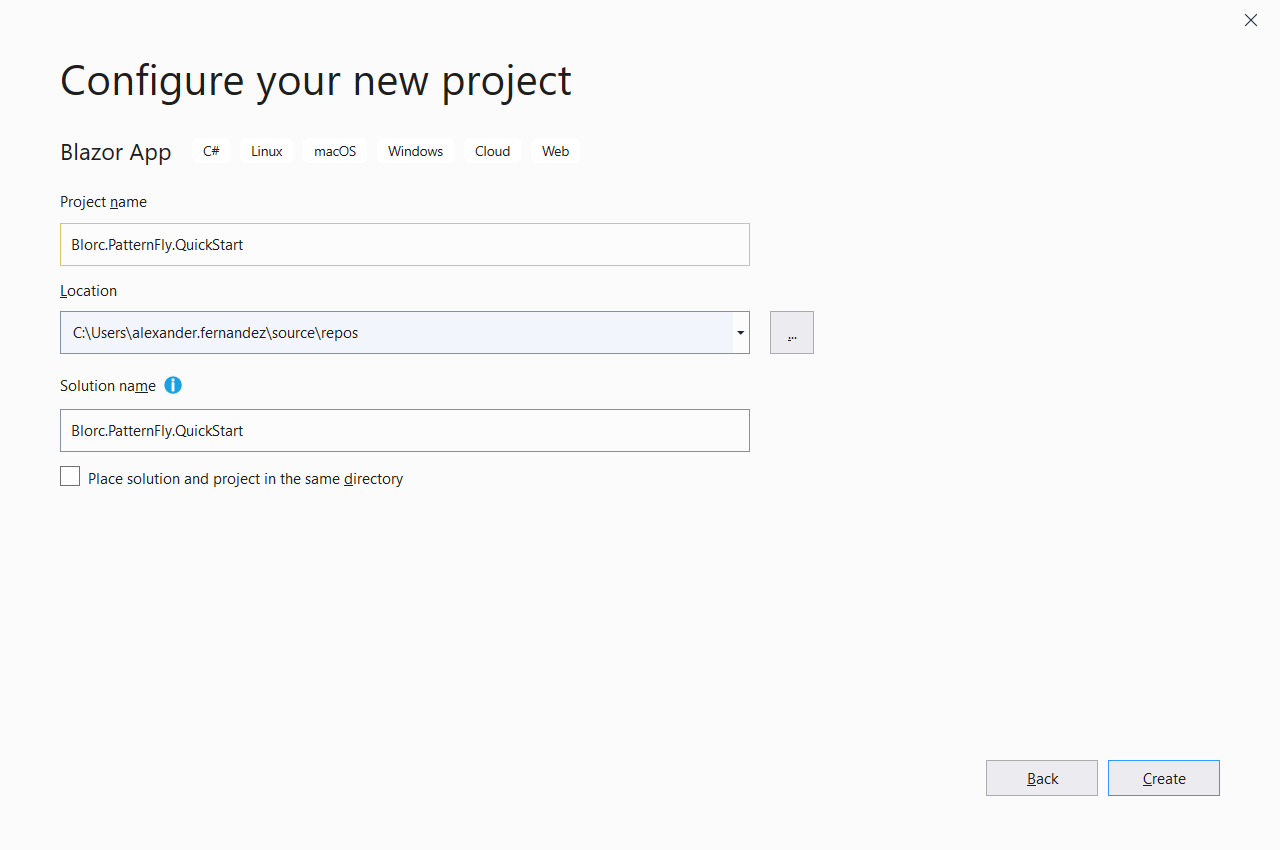
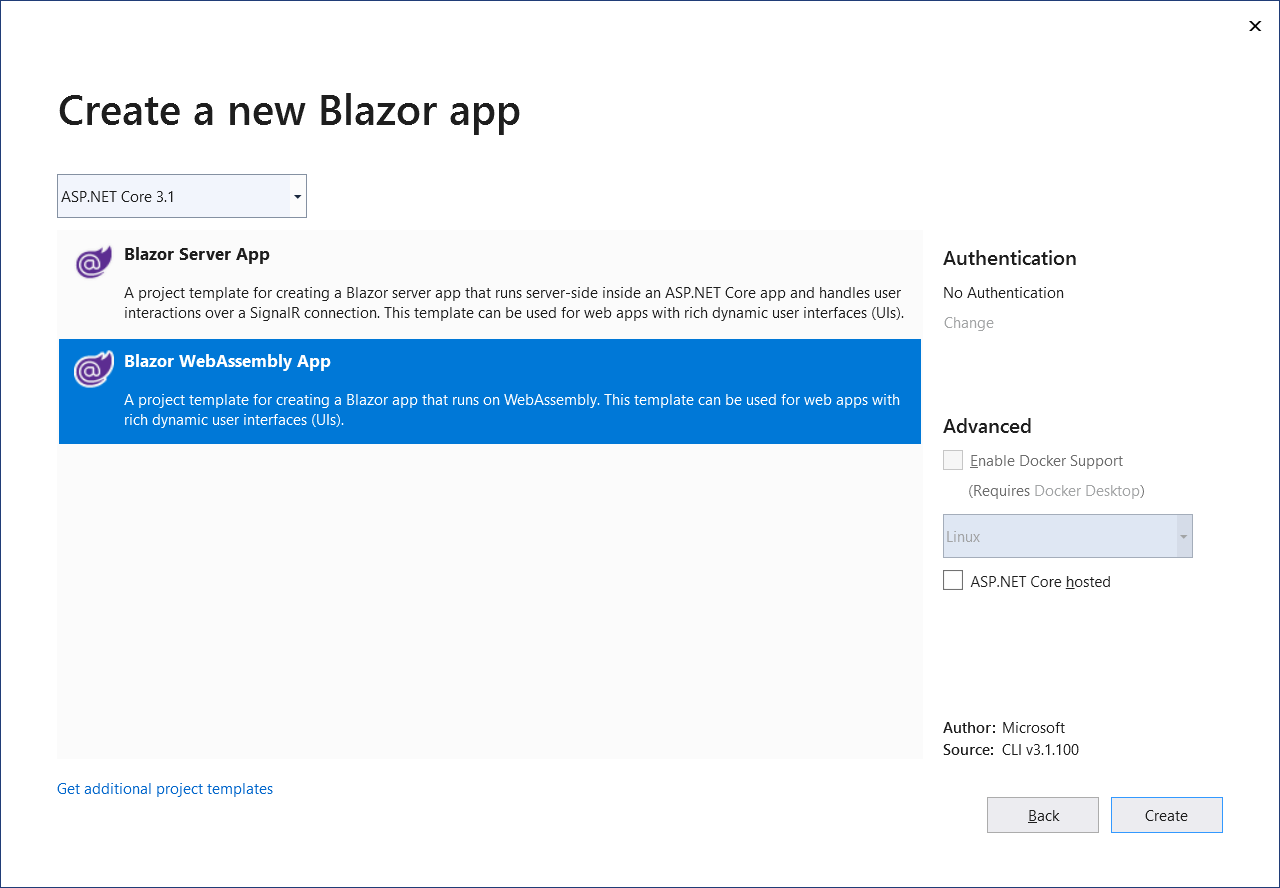
Step 1: Set up the workspace

To set up the workspace, open a PowerShell console and run the following commands:

cd $home/source/repos
md StoneAssemblies.MassAuth.QuickStart
cd StoneAssemblies.MassAuth.QuickStart
md deployment/tye
Invoke-WebRequest -Uri https://gist.githubusercontent.com/alexfdezsauco/581187a11cb49cec591d2ab7a81e4db5/raw/d1288c330e5eb4192d0d926d47e1e568936989f7/build.cake -OutFile build.cake
Invoke-WebRequest -Uri https://gist.githubusercontent.com/alexfdezsauco/761885e61409f5b62c8ce2feb844ce4b/raw/c441f624aef1e115dac4775d79f2eaef0a9fc7ad/tye.yaml -OutFile ./deployment/tye/tye.yaml
md src
cd src
dotnet new sln -n StoneAssemblies.MassAuth.QuickStart
dotnet new classlib -n StoneAssemblies.MassAuth.QuickStart.Messages
dotnet sln StoneAssemblies.MassAuth.QuickStart.sln add StoneAssemblies.MassAuth.QuickStart.Messages/StoneAssemblies.MassAuth.QuickStart.Messages.csproj
dotnet add StoneAssemblies.MassAuth.QuickStart.Messages\StoneAssemblies.MassAuth.QuickStart.Messages.csproj package StoneAssemblies.MassAuth.Messages --prerelease
dotnet new classlib -n StoneAssemblies.MassAuth.QuickStart.Rules
dotnet sln StoneAssemblies.MassAuth.QuickStart.sln add StoneAssemblies.MassAuth.QuickStart.Rules/StoneAssemblies.MassAuth.QuickStart.Rules.csproj
dotnet add StoneAssemblies.MassAuth.QuickStart.Rules/StoneAssemblies.MassAuth.QuickStart.Rules.csproj package StoneAssemblies.MassAuth.Rules --prerelease
dotnet add StoneAssemblies.MassAuth.QuickStart.Rules/StoneAssemblies.MassAuth.QuickStart.Rules.csproj reference StoneAssemblies.MassAuth.QuickStart.Messages\StoneAssemblies.MassAuth.QuickStart.Messages.csproj
dotnet new webapi -n StoneAssemblies.MassAuth.QuickStart.Services
dotnet sln StoneAssemblies.MassAuth.QuickStart.sln add StoneAssemblies.MassAuth.QuickStart.Services/StoneAssemblies.MassAuth.QuickStart.Services.csproj
dotnet add StoneAssemblies.MassAuth.QuickStart.Services/StoneAssemblies.MassAuth.QuickStart.Services.csproj package StoneAssemblies.MassAuth --prerelease
dotnet add StoneAssemblies.MassAuth.QuickStart.Services/StoneAssemblies.MassAuth.QuickStart.Services.csproj package MassTransit.RabbitMQ --version 7.2.2
dotnet add StoneAssemblies.MassAuth.QuickStart.Services/StoneAssemblies.MassAuth.QuickStart.Services.csproj package Serilog.Sinks.Console --version 4.0.0
dotnet add StoneAssemblies.MassAuth.QuickStart.Services/StoneAssemblies.MassAuth.QuickStart.Services.csproj reference StoneAssemblies.MassAuth.QuickStart.Messages\StoneAssemblies.MassAuth.QuickStart.Messages.csproj
dotnet new web -n StoneAssemblies.MassAuth.QuickStart.AuthServer
dotnet sln StoneAssemblies.MassAuth.QuickStart.sln add StoneAssemblies.MassAuth.QuickStart.AuthServer/StoneAssemblies.MassAuth.QuickStart.AuthServer.csproj
dotnet add StoneAssemblies.MassAuth.QuickStart.AuthServer/StoneAssemblies.MassAuth.QuickStart.AuthServer.csproj package StoneAssemblies.Extensibility --prerelease
dotnet add StoneAssemblies.MassAuth.QuickStart.AuthServer/StoneAssemblies.MassAuth.QuickStart.AuthServer.csproj package StoneAssemblies.MassAuth --prerelease
dotnet add StoneAssemblies.MassAuth.QuickStart.AuthServer/StoneAssemblies.MassAuth.QuickStart.AuthServer.csproj package StoneAssemblies.MassAuth.Hosting --prerelease
dotnet add StoneAssemblies.MassAuth.QuickStart.AuthServer/StoneAssemblies.MassAuth.QuickStart.AuthServer.csproj package MassTransit.RabbitMQ --version 7.2.2
dotnet add StoneAssemblies.MassAuth.QuickStart.AuthServer/StoneAssemblies.MassAuth.QuickStart.AuthServer.csproj package Serilog.Sinks.Console --version 4.0.0
view raw setup.ps1 hosted with ❤ by GitHub

After executing these commands, StoneAssemblies.MassAuth.QuickStart.sln Visual Studio solution file is created, which includes the following projects:
  • StoneAssemblies.MassAuth.QuickStart.Messages:  Class library for messages specification. 
  • StoneAssemblies.MassAuth.QuickStart.Rules: Class library to implement rules for messages.
  • StoneAssemblies.MassAuth.QuickStart.ServicesWeb API to host the services that require to be authorized by rules.
  • StoneAssemblies.MassAuth.QuickStart.AuthServerAuthorization server to host the rules for messages. 
The commands also add the required NuGet packages and project references.

If you review the content of the StoneAssemblies.MassAuth.QuickStart.AuthServer.csproj project file, you should notice a package reference to StoneAssemblies.Extensibility. This is required because all rules will be provisioned as plugins for the authorization server. 

The extensibility system is NuGet based, so we need to set up the build to provision the rules and messages as NuGet packages. For that is the purpose, this workspace configuration includes two more files. The build.cake, a cake based build script to ensure the required package output,  

var target = Argument("target", "NuGetPack");
var buildConfiguration = Argument("Configuration", "Release");
var NuGetVersionV2 = "1.0.0";
var SolutionFileName = "src/StoneAssemblies.MassAuth.QuickStart.sln";
var ComponentProjects = new string[]
{
"./src/StoneAssemblies.MassAuth.QuickStart.Messages/StoneAssemblies.MassAuth.QuickStart.Messages.csproj",
"./src/StoneAssemblies.MassAuth.QuickStart.Rules/StoneAssemblies.MassAuth.QuickStart.Rules.csproj"
};
Task("Restore")
.Does(() =>
{
DotNetCoreRestore(SolutionFileName);
});
Task("Build")
.IsDependentOn("Restore")
.Does(() =>
{
DotNetCoreBuild(
SolutionFileName,
new DotNetCoreBuildSettings()
{
Configuration = buildConfiguration,
ArgumentCustomization = args => args
.Append($"/p:Version={NuGetVersionV2}")
.Append($"/p:PackageVersion={NuGetVersionV2}")
});
});
Task("NuGetPack")
.IsDependentOn("Build")
.Does(() =>
{
string packageOutputDirectory = $"./output/nuget";
EnsureDirectoryExists(packageOutputDirectory);
CleanDirectory(packageOutputDirectory);
for (int i = 0; i < ComponentProjects.Length; i++)
{
var componentProject = ComponentProjects[i];
var settings = new DotNetCorePackSettings
{
Configuration = buildConfiguration,
OutputDirectory = packageOutputDirectory,
IncludeSymbols = true,
ArgumentCustomization = args => args
.Append($"/p:PackageVersion={NuGetVersionV2}")
.Append($"/p:Version={NuGetVersionV2}")
};
DotNetCorePack(componentProject, settings);
}
EnsureDirectoryExists("./output/nuget-symbols");
CleanDirectory("./output/nuget-symbols");
MoveFiles($"{packageOutputDirectory}/*.symbols.nupkg", "./output/nuget-symbols");
var symbolFiles = GetFiles("./output/nuget-symbols/*.symbols.nupkg");
foreach(var symbolFile in symbolFiles)
{
var newFileName = symbolFile.ToString().Replace(".symbols", "");
MoveFile(symbolFile, newFileName);
}
});
RunTarget(target);
view raw build.cake hosted with ❤ by GitHub

and the tye.yaml that will help us to run and debug the solution.
 
name: stoneassemblies-massauth-quickstart
network: stoneassemblies-massauth-quickstart-network
services:
- name: stoneassemblies-massauth-quickstart-services
project: ../../src/StoneAssemblies.MassAuth.QuickStart.Services/StoneAssemblies.MassAuth.QuickStart.Services.csproj
buildProperties:
- name: Configuration
value: Debug
env:
- name: ASPNETCORE_ENVIRONMENT
value: Development
- name: RabbitMQ:Address
value: rabbitmq://localhost:6002
- name: RabbitMQ:Username
value: queuedemo
- name: RabbitMQ:Password
value: queuedemo
bindings:
- port: 6001
- name: stoneassemblies-massauth-quickstart-authserver
project: ../../src/StoneAssemblies.MassAuth.QuickStart.AuthServer/StoneAssemblies.MassAuth.QuickStart.AuthServer.csproj
replicas: 1
buildProperties:
- name: Configuration
value: Debug
env:
- name: ASPNETCORE_ENVIRONMENT
value: Development
- name: RabbitMQ:Address
value: rabbitmq://localhost:6002
- name: RabbitMQ:Username
value: queuedemo
- name: RabbitMQ:Password
value: queuedemo
- name: Extensions:Sources:0
value: ../../output/nuget-symbols/
- name: Extensions:Sources:1
value: https://api.nuget.org/v3/index.json
- name: Extensions:Packages:0
value: StoneAssemblies.MassAuth.QuickStart.Rules
- name: stoneassemblies-massauth-quickstart-rabbitmq
image: rabbitmq:3.8.3-management
bindings:
- name: rabbitmq
port: 6002
containerPort: 5672
protocol: tcp
- name: https
port: 6003
containerPort: 15672
protocol: http
env:
- name: RABBITMQ_DEFAULT_USER
value: queuedemo
- name: RABBITMQ_DEFAULT_PASS
value: queuedemo
view raw tye.yaml hosted with ❤ by GitHub


Step 2: Contract first

Let's add a bit of complexity to the generated problem, related to the weather forecast. For instance, let's say we will allow requesting forecasts from a certain date, as some forecasts may not be available due to the complexity of the calculations.

For that purpose, we will add the following class to the message project, to request the weather forecast with the start date as an argument.
namespace StoneAssemblies.MassAuth.QuickStart.Messages
{
using System;
using StoneAssemblies.MassAuth.Messages;
public class WeatherForecastRequestMessage : MessageBase
{
public DateTime StartDate { get; set; }
}
}

Step 3: Implementing rules

Now we are ready to implement some rules for such a message. Continuing with our scenario, let's say the forecast data is only available from today and up to 10 days. This operation could be more complex through a query to an external database, but for simplicity, it will be implemented as follows.


namespace StoneAssemblies.MassAuth.QuickStart.Rules
{
using System;
using System.Threading.Tasks;
using StoneAssemblies.MassAuth.Messages;
using StoneAssemblies.MassAuth.QuickStart.Messages;
using StoneAssemblies.MassAuth.Rules.Interfaces;
public class DataAvailabilityDateRule : IRule<AuthorizationRequestMessage<WeatherForecastRequestMessage>>
{
public bool IsEnabled { get; } = true;
public string Name { get; } = "Data availability date";
public int Priority { get; }
public async Task<bool> EvaluateAsync(AuthorizationRequestMessage<WeatherForecastRequestMessage> message)
{
var days = message.Payload.StartDateTime.Subtract(DateTime.Now).TotalDays;
return days >= 0 && days < 10;
}
}
}

Step 4: Implementing services

It's time to complete the WeatherForecastController implementation in the service project. It should look like this. 

namespace StoneAssemblies.MassAuth.QuickStart.Services.Controllers
{
using System;
using System.Collections.Generic;
using System.Linq;
using Microsoft.AspNetCore.Mvc;
using Microsoft.Extensions.Logging;
using StoneAssemblies.MassAuth.QuickStart.Messages;
using StoneAssemblies.MassAuth.Services.Attributes;
[ApiController]
[Route("[controller]")]
public class WeatherForecastController : ControllerBase
{
private static readonly string[] Summaries =
{
"Freezing", "Bracing", "Chilly", "Cool", "Mild", "Warm", "Balmy", "Hot", "Sweltering", "Scorching"
};
private readonly ILogger<WeatherForecastController> _logger;
public WeatherForecastController(ILogger<WeatherForecastController> logger)
{
_logger = logger;
}
[HttpGet]
[AuthorizeByRule]
public IEnumerable<WeatherForecast> Get([FromQuery] WeatherForecastRequestMessage weatherForecastRequestMessage)
{
var rng = new Random();
return Enumerable.Range(1, 5).Select(
index => new WeatherForecast
{
Date = weatherForecastRequestMessage.StartDate.AddDays(index),
TemperatureC = rng.Next(-20, 55),
Summary = Summaries[rng.Next(Summaries.Length)]
}).ToArray();
}
}
}

Notice the usage of AuthorizeByRule attribute on the Get method, to indicate that the input message WeatherForecastRequestMessage must be processed and validated by the authorization engine before the method execution.

We also have to update the Startup class implementation.

namespace StoneAssemblies.MassAuth.QuickStart.Services
{
using MassTransit;
using Microsoft.AspNetCore.Builder;
using Microsoft.AspNetCore.Hosting;
using Microsoft.Extensions.Configuration;
using Microsoft.Extensions.DependencyInjection;
using Microsoft.Extensions.Hosting;
using Microsoft.OpenApi.Models;
using StoneAssemblies.MassAuth.QuickStart.Messages;
using StoneAssemblies.MassAuth.Services;
using StoneAssemblies.MassAuth.Services.Extensions;
public class Startup
{
public Startup(IConfiguration configuration)
{
this.Configuration = configuration;
}
public IConfiguration Configuration { get; }
public void Configure(IApplicationBuilder app, IWebHostEnvironment env)
{
if (env.IsDevelopment())
{
app.UseDeveloperExceptionPage();
app.UseSwagger();
app.UseSwaggerUI(
c => c.SwaggerEndpoint("/swagger/v1/swagger.json", "StoneAssemblies.MassAuth.QuickStart.Services v1"));
}
app.UseHttpsRedirection();
app.UseRouting();
app.UseAuthorization();
app.UseEndpoints(endpoints => { endpoints.MapControllers(); });
}
public void ConfigureServices(IServiceCollection services)
{
services.AddControllers();
services.AddSwaggerGen(
c =>
{
c.SwaggerDoc(
"v1",
new OpenApiInfo
{
Title = "StoneAssemblies.MassAuth.QuickStart.Services",
Version = "v1"
});
});
services.AddMassAuth();
var username = this.Configuration.GetSection("RabbitMQ")?["Username"] ?? "queuedemo";
var password = this.Configuration.GetSection("RabbitMQ")?["Password"] ?? "queuedemo";
var messageQueueAddress = this.Configuration.GetSection("RabbitMQ")?["Address"] ?? "rabbitmq://localhost";
services.AddMassTransit(
sc =>
{
sc.AddBus(
context => Bus.Factory.CreateUsingRabbitMq(
cfg =>
{
cfg.Host(
messageQueueAddress,
configurator =>
{
configurator.Username(username);
configurator.Password(password);
});
}));
sc.AddDefaultAuthorizationRequestClient<WeatherForecastRequestMessage>();
});
services.AddHostedService<BusHostedService>();
}
}
}
  
Basically, the AddMassAuth service collection extension method is called to register the library services and also ensure communication through the message broker. Remember, StoneAssemblies.MassAuth is built on top of MassTransit.  Finally, to read the configuration via environment variables we must update the Program class to this. 

namespace StoneAssemblies.MassAuth.QuickStart.Services
{
using Microsoft.AspNetCore.Hosting;
using Microsoft.Extensions.Configuration;
using Microsoft.Extensions.Hosting;
using Serilog;
public class Program
{
public static IHostBuilder CreateHostBuilder(string[] args)
{
Log.Logger = new LoggerConfiguration().WriteTo.Console().CreateLogger();
return Host.CreateDefaultBuilder(args)
.ConfigureAppConfiguration(builder => { builder.AddEnvironmentVariables(); })
.ConfigureWebHostDefaults(webBuilder => { webBuilder.UseStartup<Startup>(); });
}
public static void Main(string[] args)
{
CreateHostBuilder(args).Build().Run();
}
}
}

Step 5: Hosting rules

To host rules, we provide a production-ready of StoneAssemblies.MassAuth.Server as docker image available in DockerHub. But for debugging or even for customization purpose could be useful build your own rule host server. So, in the server project, we also have to update the Startup class implementation, to initialize the extensibility system and load rules. 


namespace StoneAssemblies.MassAuth.QuickStart.AuthServer
{
using GreenPipes;
using MassTransit;
using Microsoft.AspNetCore.Builder;
using Microsoft.AspNetCore.Hosting;
using Microsoft.AspNetCore.Http;
using Microsoft.Extensions.Configuration;
using Microsoft.Extensions.DependencyInjection;
using Microsoft.Extensions.Hosting;
using Serilog;
using StoneAssemblies.Extensibility.Extensions;
using StoneAssemblies.MassAuth.Hosting.Extensions;
using StoneAssemblies.MassAuth.Services;
public class Startup
{
public Startup(IConfiguration configuration)
{
this.Configuration = configuration;
}
public IConfiguration Configuration { get; }
public void Configure(IApplicationBuilder app, IWebHostEnvironment env)
{
if (env.IsDevelopment())
{
app.UseDeveloperExceptionPage();
}
app.UseRouting();
app.UseEndpoints(
endpoints => { endpoints.MapGet("/", async context => { await context.Response.WriteAsync("Hello World!"); }); });
}
public void ConfigureServices(IServiceCollection serviceCollection)
{
serviceCollection.AddExtensions(this.Configuration);
serviceCollection.AddRules();
var username = this.Configuration.GetSection("RabbitMQ")?["Username"] ?? "queuedemo";
var password = this.Configuration.GetSection("RabbitMQ")?["Password"] ?? "queuedemo";
var messageQueueAddress = this.Configuration.GetSection("RabbitMQ")?["Address"] ?? "rabbitmq://localhost";
serviceCollection.AddMassTransit(
sc =>
{
sc.AddAuthorizationRequestConsumers();
Log.Information("Connecting to message queue server with address '{ServiceAddress}'", messageQueueAddress);
sc.AddBus(
context => Bus.Factory.CreateUsingRabbitMq(
cfg =>
{
cfg.Host(
messageQueueAddress,
configurator =>
{
configurator.Username(username);
configurator.Password(password);
});
sc.ConfigureAuthorizationRequestConsumers(
(messagesType, consumerType) =>
{
cfg.DefaultReceiveEndpoint(
messagesType,
e =>
{
e.PrefetchCount = 16;
e.UseMessageRetry(x => x.Interval(2, 100));
e.ConfigureConsumer(context, consumerType);
});
});
}));
});
serviceCollection.AddHostedService<BusHostedService>();
}
}
}
Again, to read the configuration via environment variables the Program file must be updated like this. 


namespace StoneAssemblies.MassAuth.QuickStart.AuthServer
{
using Microsoft.AspNetCore.Hosting;
using Microsoft.Extensions.Configuration;
using Microsoft.Extensions.Hosting;
using Serilog;
public class Program
{
public static IHostBuilder CreateHostBuilder(string[] args)
{
Log.Logger = new LoggerConfiguration().WriteTo.Console().CreateLogger();
return Host.CreateDefaultBuilder(args)
.ConfigureAppConfiguration(builder => { builder.AddEnvironmentVariables(); })
.ConfigureWebHostDefaults(webBuilder => { webBuilder.UseStartup<Startup>(); });
}
public static void Main(string[] args)
{
CreateHostBuilder(args).Build().Run();
}
}
}

Step 6: Build, run and test

Let's see if this works. So, cross your fingers first ;)

To build and run the project, open a PowerShell terminal in the working directory and run the following commands.

dotnet cake
cd deployment/tye
tye run

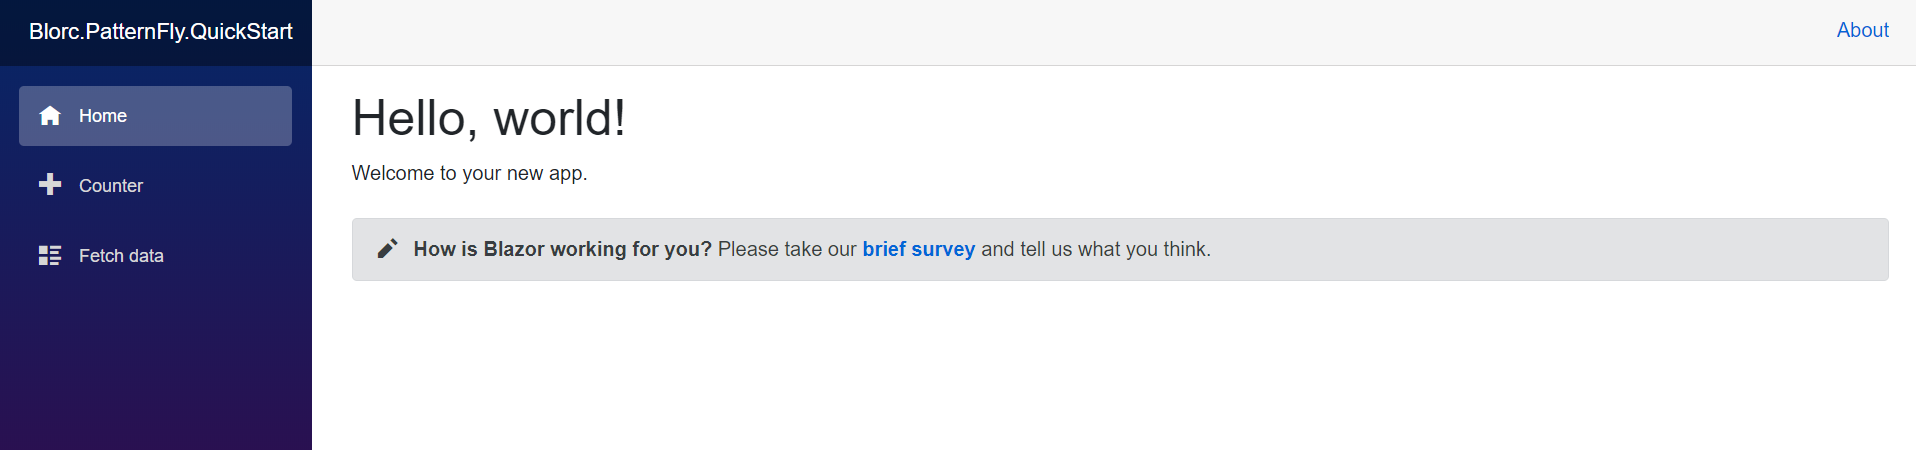
Open your browser and navigate to http://localhost:8000 to display the Tye user interface. 


You can see the logs of the rules host server to notice how extensibility works.


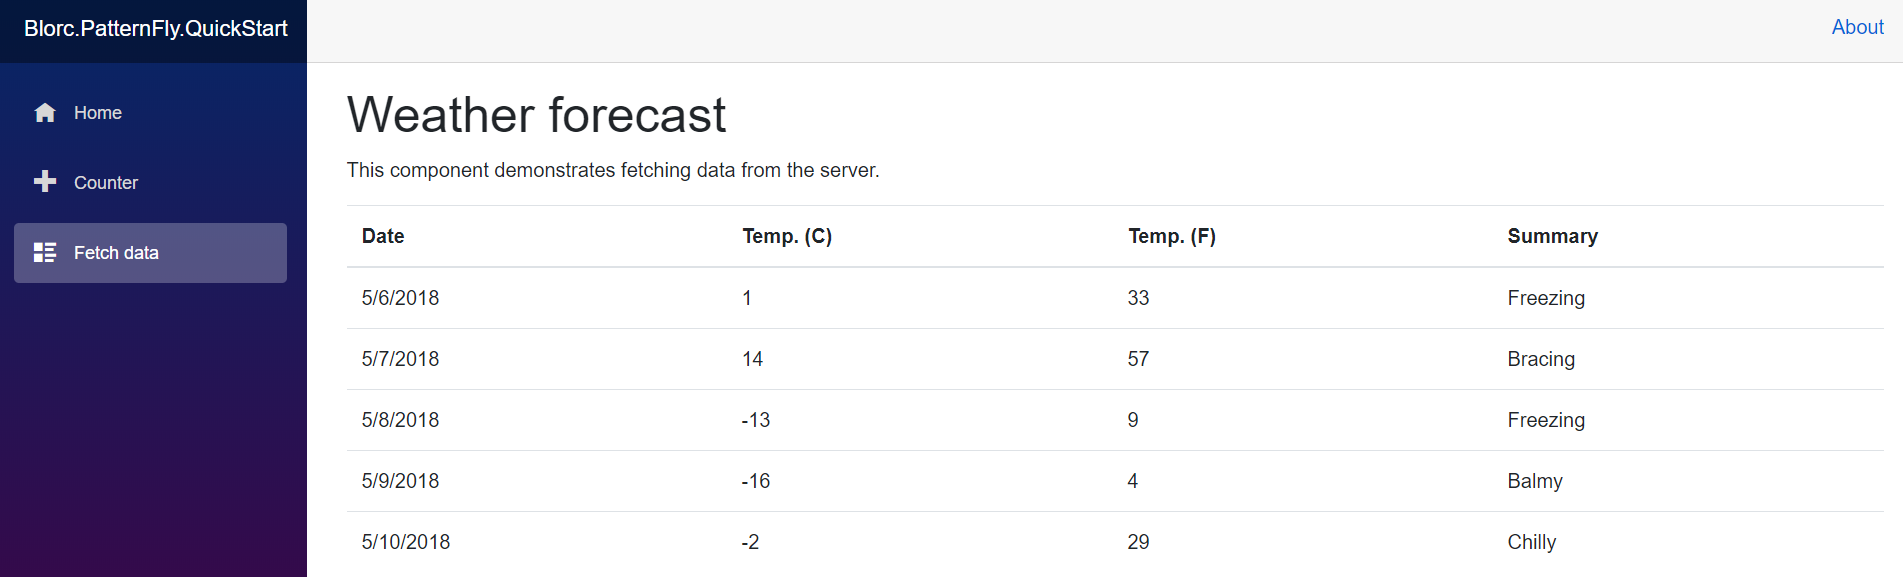
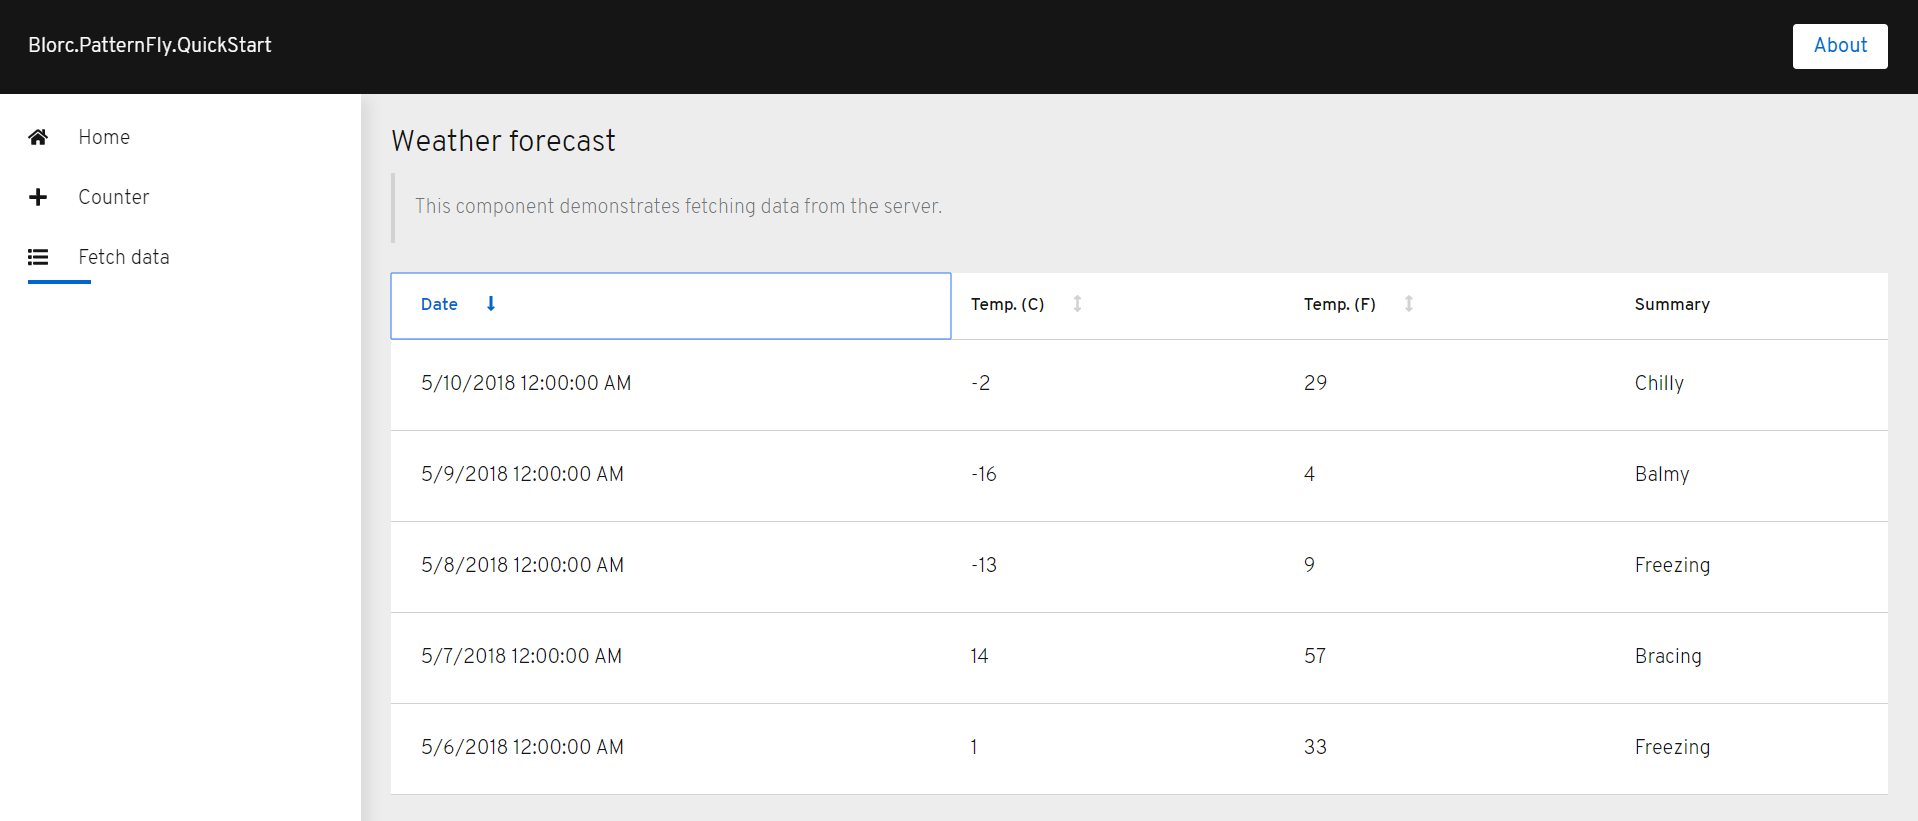
Let's do some weather forecast requests. For instance with a valid request

Invoke-WebRequest http://localhost:6001/WeatherForecast?StartDate=$([System.DateTime]::Now.AddDays(1).Date)
the output looks like this


but with an out of range request

Invoke-WebRequest http://localhost:6001/WeatherForecast?StartDate=$([System.DateTime]::Now.AddDays(11).Date)

the output shows an unauthorized response.


So, as expected, it works ;)


Closing

In case it doesn't work for you, you can always try to review the final and complete source code of this hands-on lab is in the StoneAssemblies.MassAuth.QuickStart repository is available on GitHub. 

Remember StoneAssemblies.MassAuth is a work in progress, we are continuously releasing new versions, so your feedback is welcome. Also, remember that it is an open-source project, so you can contribute too.

Enjoy «authorizing» with pleasure and endless possibilities.

Saturday, September 26, 2020

Stressless in the new jungle

This is my personal journey buying in TuEnvio

What is TuEnvio?

Described by CIMEX itself, TuEnvio is an “E-Commerce platform created by the CIMEX corporation for the national customer, which allows online purchases from the comfort of your home”. 

But you may wonder: Why is this new? The fact is that the expansion of Internet access in Cuba is actually a new phenomenon. From almost zero, without infrastructure, in a couple of years, Internet access for many Cubans is almost a reality. Right, it is very expensive thanks to ETECSA, but it continues to expand, which is good.

Since Cubans had no internet access, “no one” worried about selling products online. At least, not for Cubans that live in Cuba. Therefore, they “invented” a service called EnviosCuba for foreign families could buy products for their national’s relatives. A kind of favor-based business model, which is very sad. An approach to only capture foreign currency instead also think in the prosperity and comfort of Cubans that live in Cuba.

But the SARS-Cov-2 arrived. They would be forced to launch a service on a scale for which they were neither technologically nor logistically prepared. Its name TuEnvio.


The new jungle

TuEnvio looked promising. Several instances of the store, distributed in some physical stores, showed its “stock” online. Users were able to navigate, search and buy. But somewhat was not right. Buying what you needed wasn't exactly that easy. Eventually, you could catch a thing but the stress began to increase. As a vigilante, to buy a high demanded product, you had to stay up late at night.

TuEnvio doesn't have a native notification system, so I started implementing something to help me stay tuned. I was at home (remember COVID19), I was bored, but most importantly I had to buy.

That was the birth of  YourShipping.Monitor as a project. 


The first step was implementing a basic scraping system to be notified of the availability of products, including some searches by keywords. To improve the notification system, I also implemented a personal Telegram Bot, that also allows me some basic interactions.

So, the idea was to create an application similar to CamelCamelCamel with target TuEnvio. But everything would change when The new jungle arises. 

Shoot first, ask later

The best description of the situation was published in this video. A "parodied" scene from The Big Bang Theory television series. By the way, to understand what is happening you need to read the subtitles in Spanish ;). I'm not sure who the original author is. But it rocks. If you know him, please just let me know to update this post.


It turns out that shopping at TuEnvio wasn't too easy. Only a few viewed the products because they accessed them at the right time. Links leak?

On the other hand, the workload generated by the simultaneous access of thousands of people was handled by DATACIMEX's developers with an incorrect caching approach. If someone doesn't see a product at the right time, should wait for the cache to be invalidated within the next 3 minutes.

This, combined with the limited offer, meaning that the majority of TuEnvio's users were unable to purchase a thing. Worse still, they didn't even see a single product.

Under these circumstances YourShipping.Monitor's goals changed. I needed the notifications. But actually, I needed to interact with the store in light speed mode to add products to the shopping cart. 
  
I almost forget that this is also a technical post. So, here we go.

Parallel web scraping

YourShipping.Monitor is being implemented using the NetCore full stack including the frontend with Blazor. It allows me to track stores, departments, and products from its uniform resource locator (URL). The user must enter the link and a background process extracts the information and also tries to interact with the options of the store with a single rule: add a product to the cart at first sight. 

But what if I'm looking to the wrong department? What if one product is available in the very same second as another. This is why it was important to send as many requests as possible at the same time. Using the asynchronous capabilities of C# in combination with AsyncEnumerable library, I was able to do it, just like this. 


await storedDepartments.ParallelForEachAsync(
async storedDepartment =>
{
var departmentScraper = serviceProvider.GetService<IEntityScraper<Department>>();
var updatedDepartment = await departmentScraper.GetAsync(storedDepartment.Url);
...
}

But it wasn't just me. A community of Cuban developers launched several applications to help people to buy. Even when such applications required user interaction, the workload affected the store's servers a lot. So, CIMEX responded with an anti-scraping approach.

Fighting against the anti-scraping system

One day the scraper stopped working. All requests were redirected to a page to execute this JavaScript code.


<script type="text/javascript" src="/aes.min.js"></script>
<script>
function toNumbers(d) {
var e = []; d.replace(/(..)/g, function (d) { e.push(parseInt(d, 16)); });
return e;
}
function toHex() {
for (var d = [], d = 1 == arguments.length && arguments[0].constructor == Array ? arguments[0] : arguments, e = "", f = 0; f < d.length; f++)
e += (16 > d[f] ? "0" : "") + d[f].toString(16);
return e.toLowerCase();
}
var a = toNumbers("d68d69a9a746d20032277ede658ba3ad"),
b = toNumbers("58c9e810e2ebcc49ae9ee28af1c6dd53"),
c = toNumbers("08b1c4ea9ce8b3a5913c278b58b4c50e");
document.cookie = "ASP.KLR=" + toHex(slowAES.decrypt(c, 2, a, b)) + "; expires=Session; path=/";
location.href = "https://www.tuenvio.cu/stores.json?attempt=1";
</script>
view raw response.html hosted with ❤ by GitHub

It could be easy to figure out what is happening. They expect a cookie, with a value generated in that JavaScript. I'm already using AngleSharp to explore the DOM elements. It might be possible to evaluate such a function, to acquire the value of the cookie, using the same library? The answer is yes. AngleSharp.Js is an experimental extension that allows you to run simple JavaScript functions. So, after capturing the parameters with regex, I was able to call the function to capture the cookie value as well.


var httpClient = new HttpClient();
var requester = new HttpClientRequester(httpClient);
var config = Configuration.Default.WithRequester(requester).WithDefaultLoader(new LoaderOptions { IsResourceLoadingEnabled = true }).WithJs();
var context = BrowsingContext.New(config);
var document = await context.OpenAsync("https://www.tuenvio.cu/stores.json").WaitUntilAvailable();
// Capturing parameters
var toNumbersACall = RegexA.Match(content).Groups[1].Value;
var toNumbersBCall = RegexB.Match(content).Groups[1].Value;
var toNumbersCCall = RegexC.Match(content).Groups[1].Value;
var parameters = parametersMatch.Groups[2].Value;
parameters = parameters.Replace("a", "%A%").Replace("b", "%B%").Replace("c", "%C%");
parameters = parameters.Replace("%A%", toNumbersACall).Replace("%B%", toNumbersBCall).Replace("%C%", toNumbersCCall);
//...
cookieValue = document.ExecuteScript($"toHex(slowAES.decrypt({parameters}))").ToString();

Moving to unattended mode 

At this point, I was creating the session with the browser, saving the cookies.txt file, and making it available to the scraping server (a.k.a. YourShipping.Monitor.Server). The main reason, the captcha. But TuEnvio's captcha looks like this.


Actually, it doesn't look like a very hard captcha. Nothing that has not been broken before with tesseract-ocr. So, just added the reference to a .NET wrapper of tesseract and wrote down this


var grayCaptcha = captcha.ConvertRGBToGray();
var binarizedCaptcha = grayCaptcha.BinarizeSauvolaTiled(10, 0.75f, 1, 2);
var tesseractEngine = new TesseractEngine(Path.GetFullPath("tessdata"), "eng", EngineMode.Default);
tesseractEngine.SetVariable("tessedit_char_whitelist", "ABCDEFGHIJKLMNOPQRSTUVWXYZ1234567890");
var page = tesseractEngine.Process(binarizedCaptcha, PageSegMode.SparseText);
captchaText = page.GetText();
and you know what? It worked.

Final thoughts  

I know, this doesn't seem a bit stressful, but yeah, now it is. With YourShipping.Monitor and a bit of luck, I have been able to capture something in TuEnvio's stores. There is no guarantee, so I always insist that ETECSA should not charge for access to virtual stores. Someone can spend more money trying to buy than buying.


Recently,  CIMEX released the store's opening schedule. So now, with the effective combination of my command-line tool nauta-sessionto manage Nauta Hogar sessions, I can already go to sleep, stressless 😉.

Tuesday, January 7, 2020

Getting started with Blorc.PatternFly

Original Published on PatternFly Medium Publication


If you’re a developer who loves hands-on tactical tutorials, then read on. Today, we’re covering Blorc.PatternFly.

First off, the basics: What is Blorc.PatternFly? Standing for Blazor, Orc, and PatternFly, Blorc.PatternFly is a library with the ultimate goal of wrapping all PatternFly components and making them available as Blazor components.

Now let’s jump into a tutorial. Keep in mind that this tutorial isn’t meant as an overview of Blazor — you’ll need some basic knowledge of Blazor before diving in.

You’ll also need to have these tools handy:
  • Visual Studio 2019 (16.4.2)
  • Blazor (3.1.0-preview4.19579.2)

Step 1: Creating the project

First, go through the Get started with ASP.NET Core Blazor tutorial for Blazor WebAssembly experience. You’ll create the Blazor project in this tutorial, and you’ll only have to convert the Bootstrap to PatternFly. For the purpose of this guide, use Blorc.PatternFly.QuickStart as the project name.

Follow the on-screen instructions of the Visual Studio project:

Create a new project.

Configure your new project.

Create a new Blazor app with Blazor WebAssembly experience.

The Blazor template is built on top of Bootstrap. So the resulting app looks like this:
Index.razor and SurveyPrompt.razor
Counter.razor
FetchData.razor
From here, you’ll replace the Bootstrap look and feel with the PatternFly one.

Step 2: Startup configuration

Once the project has been created, add Blorc.PatternFly as a package reference via NuGet. At the time of writing this article (which I hope you’re enjoying!), this package is only available as prerelease. To install the latest prerelease version, check the Include prerelease option in the Package Manager.

Adding latest prerelease of Blorc.PatternFly package
Also, it’s mandatory to register the Blorc.Core services in the ConfigureServices method of the Startup class, shown below:

using Blorc.Services;
using Microsoft.AspNetCore.Components.Builder;
using Microsoft.Extensions.DependencyInjection;
namespace Blorc.PatternFly.QuickStart
{
public class Startup
{
public void ConfigureServices(IServiceCollection services)
{
services.AddBlorcCore();
}
public void Configure(IComponentsApplicationBuilder app)
{
app.AddComponent<App>("app");
}
}
}
view raw Startup.cs hosted with ❤ by GitHub

Once the Blorc services are registered, it’s time to start replacing the UI elements, starting with the content of the index.html and site.css files.

<!DOCTYPE html>
<html>
<head>
<meta charset="utf-8" />
<meta name="viewport" content="width=device-width" />
<title>Blorc.PatternFly.QuickStart</title>
<base href="/" />
<script src="_content/Blorc.Core/injector.js"></script>
<link href="css/site.css" rel="stylesheet" />
</head>
<body>
<app>Loading...</app>
<script src="_framework/blazor.webassembly.js"></script>
</body>
</html>
view raw index.html hosted with ❤ by GitHub
html, body {
font-family: 'Helvetica Neue', Helvetica, Arial, sans-serif;
}
app {
position: relative;
}
@media (min-width: 768px) {
.pf-c-page__header-brand-toggle {
display: none;
}
}
view raw site.css hosted with ❤ by GitHub

To make sure that no unused dependencies are being deployed, remove the bootstrap and open-iconic directories from the wwwroot/css directory.

Step 3: Updating pages and components

The time has come to update the components. You should be able to update the content of the razor files with references to the available Blorc.PatternFly components.

You can do this yourself by following the steps below or you can clone the repository with the source code of this tutorial.

For instance, the MainLayout component must inherit from PatternFlyLayoutComponentBase, and you can use the Page component as follows:

@using Blorc.PatternFly.Layouts
@using Blorc.PatternFly.Components.Page
@using Blorc.PatternFly.Components.Button
@inherits PatternFlyLayoutComponentBase
<Page>
<LogoContent>
Blorc.PatternFly.QuickStart
</LogoContent>
<ToolbarContent>
<Button Component="a" Variant="ButtonVariant.Primary" Href="http://blazor.net">
About
</Button>
</ToolbarContent>
<SidebarContent>
<NavMenu />
</SidebarContent>
<MainContent>
@Body
</MainContent>
</Page>
For the NavMenu, you could use the Navigation component and update the razor file as shown below:

@using Blorc.PatternFly.Components.Navigation
@using Blorc.PatternFly.Components.Icon
@using Blorc.PatternFly.Layouts.Split
<Navigation>
<Items>
<NavigationItem Link="/">
<Split IsGutter="true">
<SplitItem><HomeIcon /></SplitItem>
<SplitItem>Home</SplitItem>
</Split>
</NavigationItem>
<NavigationItem Link="/counter">
<Split IsGutter="true">
<SplitItem><PlusIcon /></SplitItem>
<SplitItem>Counter</SplitItem>
</Split>
</NavigationItem>
<NavigationItem Link="/fetchdata">
<Split IsGutter="true">
<SplitItem><ListIcon /></SplitItem>
<SplitItem>Fetch data</SplitItem>
</Split>
</NavigationItem>
</Items>
</Navigation>
view raw NavMenu.razor hosted with ❤ by GitHub
Finally, update the content of the Counter and FetchData pages.

@page "/counter"
@using Blorc.Components
@using Blorc.PatternFly.Components.Button
@using Blorc.PatternFly.Components.Text
@inherits BlorcComponentBase
<TextContent>
<Text Component="h1">Counter</Text>
</TextContent>
<TextContent>
<Text Component="blockquote">Current count: @CurrentCount</Text>
</TextContent>
<br />
<Button Variant="ButtonVariant.Primary" OnClick=@((s,e) => IncrementCount())>Click me</Button>
@code {
// Blorc.Core comes with it’s own binding system and property bag
// implementations. This allows bindings and property change
// notifications out of the box
public int CurrentCount
{
get { return GetPropertyValue<int>(nameof(CurrentCount)); }
set { SetPropertyValue(nameof(CurrentCount), value); }
}
private void IncrementCount()
{
CurrentCount++;
}
protected override void OnPropertyChanged(System.ComponentModel.PropertyChangedEventArgs e)
{
if(e.PropertyName == nameof(CurrentCount))
{
StateHasChanged();
}
}
}
view raw Counter.razor hosted with ❤ by GitHub
@page "/fetchdata"
@using System.Collections
@using Blorc.PatternFly.Components.Text
@using Blorc.PatternFly.Components.Table
@inject HttpClient Http
<TextContent>
<Text Component="h1">Weather forecast</Text>
<Text Component="blockquote">This component demonstrates fetching data from the server.</Text>
</TextContent>
<br />
@if (forecasts == null)
{
<p><em>Loading...</em></p>
}
else
{
<Table Caption="Action Column" DataSource=@(()=> forecasts as IEnumerable)>
<Header>
<Row>
<Column Label="Date" Key="Date" IsSortable="true" Idx="0" />
<Column Label="Temp. (C)" Key="TemperatureC" IsSortable="true" Idx="1" />
<Column Label="Temp. (F)" Key="TemperatureF" IsSortable="true" Idx="2" />
<Column Label="Summary" Key="Summary" Idx="3" />
</Row>
</Header>
</Table>
}
@code {
private WeatherForecast[] forecasts;
protected override async Task OnInitializedAsync()
{
forecasts = await Http.GetJsonAsync<WeatherForecast[]>("sample-data/weather.json");
}
public class WeatherForecast
{
public DateTime Date { get; set; }
public int TemperatureC { get; set; }
public string Summary { get; set; }
public int TemperatureF => 32 + (int)(TemperatureC / 0.5556);
}
}
view raw FetchData.razor hosted with ❤ by GitHub

And that’s it! Great work. Your application should now look like the screenshots below:

Index.razor and SurveyPrompt.razor
Counter.razor

FetchData.razor

Send us your feedback

Keep in mind that the library is a work in progress, and there are still a few PatternFly components being implemented. We are continuously releasing new versions. The good news is that Blorc.PatternFly is open source, and the sources are available on GitHub.

If you would like support for any new component, contribute to the Blorc.PatternFly library on GitHub. You can get in touch by:
  • Creating tickets.
  • Contributing by pull requests.
  • Contributing via Open Collective.

Finally, if you want to see the latest develop branch of Blorc.PatternFly in action, you can browse to the live demo with a full overview of all the PatternFly components already available for Blazor. And you’ll probably agree: PatternFly and Blazor are awesome — and combined, they are a beautiful pair.

Interested in contributing an article to the PatternFly Medium publication? Great! Submit your topic idea, and we’ll be in touch.

X-ray StoneAssemblies.MassAuth with NDepend

Introduction A long time ago, I wrote this post  Why should you start using NDepend?  which I consider as the best post I have ever...