Friday, November 2, 2012

More about Catel and Prism in combination

Introduction

Since Catel 3.2 the support of Prism was enhanced. The fact is that several classes were introduced into Catel.Extensions.Prism to simplify the modules and bootstrapper implementation, and thanks to dependency injection support of the ServiceLocator everything can be done with Catel without the usage of third party containers.

But  now, with 3.4, a lot of improvements were introduced and the Prism extension is working like charm.

Lets take a look to a couple of scenarios.
 

Modularity with Catel explained

Probably you actually noticed the close resemblance of the UI with the Prism's Quick Start examples (with MEF or Unity). Actually this example is an adaptation of the original sources in order to show how use the Prism features in combination with Catel.


Here are some implementation details:

1) Catel comes with two versions of  generic classes, named BootstrapperBase, that helps to initialize with ease the shell and the module catalog. There are several methods that you are able to override, such as ConfigureContainer or ConfigureModuleCatalog, in order to setup the IoC container (a.k.a ServiceLocator) and the module catalog respectively, just like this:

    /// <summary>
    /// Initializes Prism to start this quickstart Prism application to use Catel.
    /// </summary>
    public class QuickStartBootstrapper : BootstrapperBase<Shell, CompositeModuleCatalog>
    {
        #region Fields

        /// <summary>
        /// The callback logger.
        /// </summary>
        private readonly CallbackLogger callbackLogger = new CallbackLogger();

        #endregion

        #region Methods

        /// <summary>
        /// Configures the <see cref="IServiceLocator"/>. May be overwritten in a derived class to add specific
        /// type mappings required by the application.
        /// </summary>
        protected override void ConfigureContainer()
        {
            base.ConfigureContainer();
            Container.RegisterTypeIfNotYetRegistered<IModuleTracker, ModuleTracker>();

            LogManager.AddListener(callbackLogger);

            Container.RegisterInstance<CallbackLogger>(callbackLogger);
        }

        /// <summary>
        /// Configures the <see cref="IModuleCatalog"/> used by Prism.
        /// </summary>
        protected override void ConfigureModuleCatalog()
        {
            ModuleCatalog.Add(Catel.Modules.ModuleCatalog.CreateFromXaml(new Uri("/ModularityWithCatel.Silverlight;component/ModulesCatalog.xaml", UriKind.Relative)));

            var moduleCatalog = new ModuleCatalog();
            // Module A is defined in the code.
            Type moduleAType = typeof(ModuleA.ModuleA);
            moduleCatalog.AddModule(new ModuleInfo(moduleAType.Name, moduleAType.AssemblyQualifiedName, "ModuleD"));

            // Module C is defined in the code.
            Type moduleCType = typeof(ModuleC.ModuleC);
            moduleCatalog.AddModule(new ModuleInfo { ModuleName = moduleCType.Name, ModuleType = moduleCType.AssemblyQualifiedName, InitializationMode = InitializationMode.OnDemand });

            ModuleCatalog.Add(moduleCatalog);
        }

        #endregion
    }

2) Catel also comes with the CompositeModuleCatalog class to deal with many catalog as one. The current implementation actually "allow" cross module catalog's module dependencies.

3) For a module implementation the common approach is  inherit from ModuleBase just like this:


    /// <summary>
    /// A module for the quickstart.
    /// </summary>
    public class ModuleA : ModuleBase
    {
        /// <summary>
        /// Initializes a new instance of the <see cref="ModuleA"/> class.
        /// </summary>
        /// </param name="moduleTracker">The module tracker.</param>        
        public ModuleA(IModuleTracker moduleTracker) : base("ModuleA", moduleTracker)
        {
        }
    }

4) The common implementation of the application class is about the instantiation of the Bootstrapper and making a call to the Run method.

var bootstrapper = new QuickStartBootstrapper();
bootstrapper.Run();

But, what will happend if you call RunWithSplashScreen instead? Try with the latest beta and discover the feature by your self or just take a look into orchesta.

Enhanced working with regions

Some time ago, I wrote about a feature where your were able to inject a view from a view model from it's view model:
 
 
	var employeeViewModel = new EmployeeViewModel();
	var uiVisualizerService = GetService<IUIVisualizerService>();
	uiVisualizerService.Activate(viewModel, "MainRegion");

1) But now you can deal with more than one shell and do this:

	uiVisualizerService.Activate(employeeViewModel, this, "MainRegion");

Where the second parameter is the parent view-model.

2) Actually you are able to inject views (referencing it's view models) in any window. Just like the previous example but in combination with the experimental extension method Show:

	var uiVisualizerService = GetService<IUIVisualizerService>();
	var windowViewModel = new WindowWithRegionViewModel();
	uiVisualizerService.Show(windowViewModel, () => { uiVisualizerService.Activate(new EmployeeViewModel(),  windowViewModel, "WindowMainRegion") });

Conclusions

1) The usage of third party Prism Extensions like MEF or Unity is no longer required. Catel Service Locator support dependency injection and is actually configured to work just as Prism expect, the fact is that the ServiceLocatorAdapter do this job.
 
2) Now, you are able to have a nice programming session with Prism & Catel.

Thursday, August 23, 2012

Creating a view model with a model and mappings with CatelR#

There are tons of yarns based on MVVM developer’s experiences behind Catel framework. Some of them are well documented on Catel docs and one of my favorites is the named "Creating a view model with a model and mappings".

When I started to read it I identified myself as one of those developers that map all the view model properties back to the model.

I will remember you how it started:

"During the use of the MVVM pattern, we noticed that lots and lots of developers have a model, and map the values of the model to all properties of the view model. When the UI closes, the developers map all the properties back to the model. All this redundant code is not necessary when using the view models of Catel." More...

This only feature makes that my interest about Catel grown until I became one of the members of the development team. But this is part of the other history.

Let’s go back to the Catel feature again. If you don’t remember how it works, here is a summary.

Basically if you want to create a model the only thing that you have to do is decorate a view model property with the ModelAttribute. So if you want to expose the model property as view model one, and don’t write the mapping back code you must decorate the exposed property with the ViewModelToModelAttribute just like this:

    /// 
    /// The person view model.
    /// 
    public class PersonViewModel : ViewModelBase
    {
        #region Static Fields

        /// Register the FirstName property so it is known in the class.
        public static readonly PropertyData FirstNameProperty = RegisterProperty("FirstName", typeof(string));

        /// Register the Person property so it is known in the class.
        public static readonly PropertyData PersonProperty = RegisterProperty("Person", typeof(Person));

        #endregion

        #region Public Properties

        /// 
        /// Gets or sets the first name.
        /// 
        [ViewModelToModel("Person")]
        public string FirstName
        {
            get { return GetValue<string>(FirstNameProperty); }
            set { SetValue(FirstNameProperty, value); }
        }

        /// 
        /// Gets or sets the person.
        /// 
        [Model]
        public Person Person
        {
            get { return GetValue<Person>(PersonProperty); }
            set { SetValue(PersonProperty, value); }
        }

        #endregion
    }
 
This example will automatically create a mapping between Person.FirstName and PersonViewModel.FirstName.

This feature is amazing and Catel distributes some code snippets to accelerate writing such code:
  • vm - declare a view model
  • vmpropmodel - declare a property as model on a view model
  • vmpropviewmodeltomodel - declare a property as a pass-through property on a view model

But could you imagine to yourself writing this code (and more) as fast as is possible (near to the speed of light). Don't you believe me?

Watch the movie, and believe me, it is in slow motion ;)


This is a forthcoming feature of CateR#, now powered by Catel itself.

You got more ideas? Let us know!

Tuesday, August 14, 2012

When use the "View Model First" approach?

Introduction

I have been waiting for Catel 3.2 to write about some features, especially about the all new modularity stuff (a.k.a. the Prism extension) and how it works in the second part of "Catel creates a perfect combination with Prism". But, always there is an excuse, we are still working on some Prism features and improvements, therefore the second part will have to wait.

So, this post will be about an interesting approach and how transform "untestable" code, from the code-behind, as "testable" view model code. The name is "View Model First". I will try to illustrate it transforming a "View First" implementation into a "View Model First" one.

The problem

"Digesting" the sample codes of Telerik components (WPF/SL) I noticed that some of them, as part of its name, contain the tag "MVVM". The fact is that most of these components have MVVM support but several examples of this suite are written in code-behind. I know it is a demo application but some of the Telerik components are actually written to be used in code-behind, therefore some logic that could be easy to test becomes hard to test.


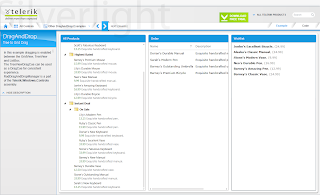
Let's take a look into the "Tree to Grid Drag" drag and drop example. I will remove some part of the code for simplification.

public partial class Example : System.Windows.Controls.UserControl
{
  public Example()
  {
    // Allow dropping into the ListBox and GridView only if the
    // dragged items are all products:
    RadDragAndDropManager.AddDropQueryHandler(wishlistView, OnDropQuery); 
    RadDragAndDropManager.AddDropQueryHandler(orderView, OnDropQuery); 

    // Change the drag cue and choose an action for the sucessful drop
    // in the Wishlist:
    RadDragAndDropManager.AddDropInfoHandler(wishlistView, OnWishlistDropInfo);

    // Change the drag cue and choose an action for the sucessful drop
    // in the Order GridView:
    RadDragAndDropManager.AddDropInfoHandler(orderView, OnGridViewDropInfo);

    // Allow dragging of the Wishlist and Order items:
    RadDragAndDropManager.AddDragQueryHandler(wishlistView, OnWishListDragQuery);
    RadDragAndDropManager.AddDragQueryHandler(orderView, OnOrderDragQuery);

    // Handle the case when items are dragged away from  the ListBox
    // and the Order:
    RadDragAndDropManager.AddDragInfoHandler(wishlistView, OnWishListDragInfo); 
    RadDragAndDropManager.AddDragInfoHandler(orderView, OnOrderDragInfo);
  }
}

You should notice that everything is about the RadDragAndDropManager. This static class needs a control reference to setup the drag and drop stuff.  This operation forces us to write code that could be part of the VM code on the code-behind. At least the highlighted code could be part of the logic of the view model of Example control removing the access to the list of elements via ListBox control reference.

private void OnWishlistDropInfo(object sender, DragDropEventArgs e)
{
  System.Windows.Controls.ItemsControl wishlist = e.Options.Destination as System.Windows.Controls.ItemsControl;
  ICollection draggedItems = e.Options.Payload as ICollection;

  // Get the drag cu that the TreeView or we have created
  TreeViewDragCue cue = e.Options.DragCue as TreeViewDragCue;

  if (e.Options.Status == DragStatus.DropPossible)
  {
    // Set a suitable text:
    cue.DragActionContent = String.Format("Add {0} item{1} to Wishlist", draggedItems.Count, draggedItems.Count > 1 ? "s" : String.Empty);
    cue.IsDropPossible = true;
    wishlist.Background = this.Resources["DropPossibleBackground"] as Brush;
  }
  else if (e.Options.Status == DragStatus.DropImpossible)
  {
    cue.DragActionContent = null;
    cue.IsDropPossible = false;
  }
  else if (e.Options.Status == DragStatus.DropComplete)
  {
    IList items = wishlist.ItemsSource as IList;
    foreach (object draggedItem in draggedItems)
    {
      items.Add(draggedItem);
    }
  }

  if (e.Options.Status != DragStatus.DropPossible)
  {
    wishlist.Background = new SolidColorBrush(Colors.White);
  }
}


So how to transform the code above into MVVM "compatible" code? That is the problem that I will try to solve in this post.


The solution

The approach to solve this problem is quite simple and has a name "View Model First". The only thing we have to do is visualize the solution from the view model point of view.

The very first steps to re-write the drag and drop example with view model support is to install the Catel.MVVM nuget package, at least for me ;).

Using the Catel naming conventions the Example control will be renamed as ExampleView (now it inherits from Catel.Windows.Controls.UserControl)  and  the ExampleViewModel will be introduced (inheriting from Catel.MVVM.ViewModelBase).

I will also rename the ProductViewModel and CategoryViewModel as Product and Category and now inherits from DataObjectBase. They are actually model classes instead view model ones.

The ExampleViewModel class looks like this:

public class ExampleViewModel : ViewModelBase
{
  public static readonly PropertyData OrdersProperty = RegisterProperty("Orders", typeof(ObservableCollection<Product>));

  public static readonly PropertyData SelectedOrdersProperty = RegisterProperty("SelectedOrders", typeof(ObservableCollection<Product>));

  public static readonly PropertyData SelectedWishesProperty = RegisterProperty("SelectedWishes", typeof(ObservableCollection<Product>));

  public static readonly PropertyData WishesProperty = RegisterProperty("Wishes", typeof(ObservableCollection<Product>));

  public ObservableCollection<Product> Wishes
  {
    get  { return this.GetValue<ObservableCollection<Product>>(WishesProperty); }
    set {  this.SetValue(WishesProperty, value); }
  }

  public ObservableCollection<Product> SelectedWishes
  {
    get  { return this.GetValue<ObservableCollection<Product>>(SelectedWishesProperty); }
    set {  this.SetValue(SelectedWishesProperty, value); }
  }

  public ObservableCollection<Product> Orders
  {
    get  { return this.GetValue<ObservableCollection<Product>>(OrdersProperty); }
    set {  this.SetValue(OrdersProperty, value); }
  }

  public ObservableCollection<Product> SelectedOrders
  {
    get  { return this.GetValue<ObservableCollection<Product>>(SelectedOrdersProperty); }
    set {  this.SetValue(SelectedOrders, value); }
  }
}


With this transformation we are able to attach or bind the ItemsSource property of  the wishlistView (ListBox) and orderView (RadGridView) to Wishes and Orders view model properties respectively. I will also add some logic to fill the SelectedWishes and SelectedOrders properties with an event to command approach to be synchronized with the selected elements on the UI.

At this point I will introduce a service named IDragAndDropService, in order to "map" a property of the view model with a control that have it attached to the ItemsSource property. The interface of this service will be defined as follow:

public interface IDragAndDropService
{
  void AddDragInfoHandler(IViewModel viewModel, Expression<Func<IList>> propertyExpression, EventHandler<DragDropEventArgs> eventHandler, string dependencyPropertyName = "ItemsSourceProperty");

  void AddDragQueryHandler(IViewModel viewModel, Expression<Func<IList>> propertyExpression, EventHandler<DragDropQueryEventArgs> eventHandler, string dependencyPropertyName = "ItemsSourceProperty");

  void AddDropInfoHandler(IViewModel viewModel, Expression<Func<IList>> propertyExpression, EventHandler<DragDropEventArgs> eventHandler, string dependencyPropertyName = "ItemsSourceProperty");

  void AddDropQueryHandler(IViewModel viewModel, Expression<Func<IList>> propertyExpression, EventHandler<DragDropQueryEventArgs> eventHandler, string dependencyPropertyName = "ItemsSourceProperty");
} 


The code above was the first thing that came to my mind with the more pure style of the Catel developers ;)

Now during the initialization of the example view model we can use it, resolving it instance from the ServiceLocator, to setup the drag and drop operations.

protected override void Initialize()
{
  var dragAndDropService = this.GetService<IDragAndDropService>();
 
  // Allow dropping into the Wishlist and Order only if the dragged items are all products:
  dragAndDropService.AddDropQueryHandler(this, () => this.Wishes, this.OnDropQuery);
  dragAndDropService.AddDropQueryHandler(this, () => this.Orders, this.OnDropQuery);
 
  // Choose an action for the sucessful drop in the Wishlist via Wishes property:
  dragAndDropService.AddDropInfoHandler(this, () => this.Wishes, this.OnWishesDropInfo);
 
  // Choose an action for the sucessful drop in the Order GridView via Orders property:
  dragAndDropService.AddDropInfoHandler(this, () => this.Orders, this.OnOrdersDropInfo);
 
  // Allow dragging of the Wishlist and Order items:
  dragAndDropService.AddDragQueryHandler(this, () => this.Wishes, this.OnWishesDragQuery);
  dragAndDropService.AddDragQueryHandler(this, () => this.Orders, this.OnOrdersDragQuery);
 
  // Handle the case when items are dragged away from  the Wishlist and the Order:
  dragAndDropService.AddDragInfoHandler(this, () => this.Wishes, this.OnWishesDragInfo);
  dragAndDropService.AddDragInfoHandler(this, () => this.Orders, this.OnOrdersDragInfo);
}


Then we are able to move some code from code-behind to our view model just like this:

private void OnWishesDragQuery(object sender, DragDropQueryEventArgs e)
{
  List<ProductModel> productModels = this.SelectedWishes.ToList();
  e.QueryResult = productModels.Count > 0;
  if ((bool)e.QueryResult)
  {
    e.Options.Payload = productModels;
  }
}

private void OnWishesDragInfo(object sender, DragDropEventArgs e)
{
  if (e.Options.Status == DragStatus.DragComplete)
  {
    IEnumerable<ProductModel> productModels = (e.Options.Payload as IEnumerable).Cast<ProductModel>();
    foreach (ProductModel draggedItem in productModels)
    {
      this.Wishes.Remove(draggedItem);
      this.SelectedWishes.Remove(draggedItem);
    }
  }
}

private void OnOrdersDropInfo(object sender, DragDropEventArgs e)
{
  if (e.Options.Status == DragStatus.DropComplete)
  {
    IEnumerable<ProductModel> productModels = (e.Options.Payload as IEnumerable).Cast<ProductModel>();
    foreach (ProductModel draggedItem in productModels)
    {
      this.Orders.Add(draggedItem);
    }
  }
}


The code that we moved from the code-behind is quite ease to test using any mock library, mocking the IDragAndDropService interface.

But we have to implement the RadDragAndDropService to make the UI controls works as we expected.

Implementing the RadDragAndDropService

The only issue here is about get the active view(s) from the view model instance. Here is where Catel 3.3 comes to save us with the introduction of the ViewManager. The logic inside the MVVM logic of Catel carries with the auto-registration of the control and its association with its view models. So the only thing that we have to do is get the active view(s) using the GetViewsOfViewModel method and lookup the first control.

Basically the search is a wide search through the visual tree a returns the first one dependency object that commits the condition (the dependencyProperty is attached to the view model property) and call the RadDragAndDropManager as usual, just like this:

public void AddDragInfoHandler(IViewModel viewModel, Expression<Func<IList>> propertyExpression, EventHandler<DragDropEventArgs> eventHandler, string dependencyPropertyName = "ItemsSourceProperty")
{
  Argument.IsNotNull("viewModel", viewModel);
  Argument.IsNotNull("propertyExpression", propertyExpression);
  Argument.IsNotNull("eventHandler", eventHandler);
  Argument.IsNotNullOrWhitespace("dependencyPropertyName", dependencyPropertyName);
  Argument.IsOfType("propertyExpression.Body", propertyExpression.Body, typeof(MemberExpression));

  var memberExpression = (MemberExpression)propertyExpression.Body;
  if (memberExpression.Member.MemberType != MemberTypes.Property)
  {
    throw new ArgumentException(MemberExpressionShouldBeAPropertyErrorMessage);
  }

  IView[] activeViews = this.ServiceLocator.ResolveType<IViewManager>().GetViewsOfViewModel(viewModel);
  foreach (IView activeView in activeViews)
  {
    DependencyObject dependencyObject = FindChildDependencyObjectAttachedToProperty(activeView, propertyExpression, dependencyPropertyName);
    RadDragAndDropManager.AddDragInfoHandler(dependencyObject, eventHandler);
  }
}


The highlighted code shows you the usage of the ViewManager and the RadDragAndDropManager.

To review the details of the implementation grab the code sample here.

Conclusions

1) There is "always" a way to re-write a "View First" approach as "View Model First" one. Sometimes could be hard but is a win-win situation when you invest time to write custom services because you will gain testability and control of your code. So use the "View Model First" as much as you can.

2) Now with the Catel ViewManager is almost possible write any services that allow you to "interact" with "untestable" components without referencing it directly from your view model code.

3) An update of  Prism extension of Catel using the ViewManager will come as soon as possible, planned for Catel 3.4.

4) Writing about code testability remembered me that I have to start to write about my experience using NCover 4, but this will part of my next blog post, I think, at least for now ;).

Friday, June 8, 2012

Release notes generation puzzle

Introduction


Why a puzzle? It is just about interaction. I want to share my knowledge with you and hope you want to share your knowledge with me. I know you as a reader of this blog have lots of wisdom I can learn from.

I know that I'm "copying" the style of Java specialists with this kind of a puzzle but I like it, so here we go...


The problem


I will talk about a very simple and useful practice, which I have formalized thanks to the combination of Catel team practices and my own development process automation needs. It isn't a new one and probably you have used it before.

Let's start taking a look at the Catel history file, located at %workspace%\doc\history.txt. I just show you a summary for simplification and, why not, I also give you a preview of the next version of Catel.

Catel history
=============
(+) Added
(*) Changed
(-) Removed
(x) Error / bug (fix)

...
===========
Version 3.2
===========
Release date:
=============
2012/xx/xx

Added/fixed:
============
...
(+) Added IViewModelFactory so the instantiation of view models can now be fully controlled and customized
(+) Added Description property to IMementoSupport to allow a description to the end-user for memento classes
(*) The IOpenFileService now supports multiple files and in WPF it also supports a title
...
(*) Updated System.Windows.Interactivity.dll for SL5

(x) Fixed issue that views and view models could not be resolved when a naming convention contained 2 or more [UP] constants
...
===========
Version 3.1
===========
...

I always dreamed to produce this kind of release notes. But all my previous attempts gave me a strong headache because sometimes the issue tracker doesn't contain all features/fixes that were born from the "creative" developer process or the version control commit comments just said something like "Merged".

So, where does the history file added/fixed lines come from?

Read the history file again. You should notice a legend and the very simple technique that allows us to tag the changes and document them over time.

But it seems like an overwhelming task and requires self-discipline to keep this kind of log up-to-date. Actually we (the Catel team) update this file manually, actually, Geert do most of these updates,  and we also know many teams that do it manually as well.

But this doesn't need to be updated manually. This is the problem that I want to solve and I hope you will share your experience and knowledge with me. The solution is pretty simple but it just become clear to me when I ported the "relevant" commit comment technique (the Catel team practice) to one of my "real live" projects.

Is it to possible generate release notes with a combination of "relevant" commit comment techniques, of course, a version control system (VCS), an issue tracker system (ITS), and a continuous integration server (CIS)?

The clues


1)  What is a "relevant" commit comment?

    A "relevant" commit comment is about a commit comment that indicates a feature completion.  It should be related to addition, modification, removal, or bug fixing, but just when those goals are actually "Done, Done". Yes, you read well, I wrote: "Done, Done". A feature is "Done, Done" when is tested, coded, designed or refactored, integrated, it builds, etc. For details read more "The Art of Agile Development".

2) Take a look at the source control page.


The solution


There are several scenarios; the fact is that there are tons of version control systems, issue trackers, and continuous integration servers. So, I will wait for your solutions for a couple of weeks, you just have to comment here about it.

I want to share my solution with Subversion (VCS), Team Foundation Server (ITS) with Scrum for Team System process template, and Team City (CIS) but you will need to wait for my next blog post. The truth is that I still have to implement it ;).

What do you think? Can this problem be solved? I know, you have the answer and I am waiting for it.

Remember a couple of weeks. Please don't hesitate just comment on your solution here.

Monday, May 14, 2012

Catel creates a perfect combination with PRISM

Introduction


I have been very "busy" watching the final of the baseball season. The past week, my team was eliminated on quarterfinals, so now I have  time to write.

Talking about competitions, I just remembered the history about how Catel.Extensions.Prism was born.

You may think that Catel and PRISM are competitors. The fact is that most people think that they are competitors. Actually I had the same idea when I discovered Catel, some time after I have been written LoB systems with PRISM. If you read the highlights, is not hard to notice the "isolated" features, mainly if you are looking for guidance or a stating point for the MVVM pattern implementation.

Catel has an out of the box view model base implementation, plus services, with full support for validation, property change notification and commanding. From my point of view Catel beats PRISM as MVVM pattern implementation guidance, with a cleaner approach on separation of views and view models and better testability. The fact is that PRISM has no a ViewModelBase implementation.

So, at some point, I considered removing all the PRISM references from my projects. But then I would loose many PRISM features, that allow you manage the modularity and view composition, that are hard to leave behind when you actually used it. I heard some people talking about the PRISM approach saying that it is a bit complex or strange. They provide example terms like bootstrapper, shell, module catalog, modules, region manager, etc. But the truth is that PRISM provides a good scaffold for modular application development.

That was the moment when we thought that they should be work together and that was the reason for we wrote Catel.Extensions.Prism and it is now available via NuGet.

User Interface Composition with Catel.Extensions.Prism


Starting with Catel 3.1 the Prism extension is available. PRISM includes a feature named "User Interface Composition". Basically it allows building a mosaic like application by loading multiple views that comes from different modules into an active region exposed by a control, also know as the shell.


The PRISM UI composition approach requires that you reference the view or the view type in order to associate it with one region. That is correct if you are coding a module class for instance, but all this is about view models.

In order to understand the code samples you need to read more about UIVisualizerService, and the way it can resolve a view from an instance of a view model. Now you are able to create a composite user interface without actually referencing any view from a view model class.

Making the region manager available

First of all, you must make available the region manager on the instance of ServiceLocator (IoC container of Catel). A PRISM based application uses MEF or Unity as primary IoC container. Therefore, you must synchronize this container with the Catel one, overriding the ConfigureContainer method of the application bootstrapper class, using the following code:

protected override void ConfigureContainer()
{
 base.ConfigureContainer();
 if (ServiceLocator.Instance.IsExternalContainerSupported(this.Container))
 {
  ServiceLocator.Instance.RegisterExternalContainer(this.Container);
 }
}

Activating a view into a specific region

To activate a view into a specific region from inside a view model, use the following code:
 var viewModel = new EmployeeViewModel();
 var uiVisualizerService = GetService<IUIVisualizerService>();
 uiVisualizerService.Activate(viewModel, "MainRegion");

Deactivating a view

To deactivate a view, use the following code:
uiVisualizerService.Deactivate(viewModel);

If you keep your view model alive (see: Keeping view models alive), you can reactivate a deactivated the view using Activate method without specify the region name. 

Deactivating a view automatically

If you close the view model using SaveAndCloseViewModel or CancelAndCloseViewModel or CloseViewModel methods, the view that belongs to this view model will be automatically deactivated from the region where it was activated.

Conclusions   

Nowadays, I enjoy write applications with Catel and PRISM, or with PRISM and Catel, the order doesn't matter. I will just give you one advice, try out this extension and like a host of a popular TV show that I know say, "draw your own conclusions by yourself" ;)

Wednesday, April 25, 2012

Accelerating Catel coding workflow with CatelR#

Overview


The  first release  of ReSharper  (R#)  provoked a  commotion, at  least between my programming  fellowships. Expressions like  "Visual Studio is a great development  tool, but with ReSharper is  awesome" were commonly repeated.

The main reason  of R# success was that the JetBrains team identified a weak point of the Visual Studio coding editor.

Visual Studio, at least in it's firsts versions (.NET versions, 2003, 2005), had no refactoring features,  just like other Java IDEs already had, such as Eclipse or IntelliJ. Also note that  the last two versions of Visual  Studio  improved it's refactoring  features but nothing come close with the power of the R#.

But I will not to talk about R# history, actually the preceding paragraph could be not totally accurate.  I don't  really know how R# was born. (If you know it, don't doubt, just comment it here, allow me to be in the know)

R# as coding workflow guidance


The R#  quick fix  and/or context  action is  very simple  and powerful workflow.  Basically  you can  locate  the  caret  position near  to  an element that  you want to alter, press  Alt + Enter,  and all available suggestions will be displayed. For instance, if you  press Alt + Enter in a  range  corresponding  to  a  "public" modifier  of  a  property,  the suggestions  "To internal", "To  protected" or "To private" would be available, only the options that do not provoke a broken usage are displayed.
 
 {caret}public string FirstName { get; set; }

But all  scenarios are not covered by R#,  there are tons of frameworks and/or toolkit that have it own coding workflows.

Catel coding workflow


If  you are  writing  a WPF  or Silverlight  application  and don't  use Catel, it is  probably that you are not using the right library. See the comparison sheet, for detailed libraries comparison.

But Catel has a "down side". If you want to convert a simple class into a data  or model class in order to  support property changed  notifications and validations, you need re-coding a class like this one:

public class Person
{
 public string FirstName { get; set; }

 public string MiddleName { get; set; }

 public string LastName { get; set; }
}

into this one:

public class Person
{
 public static readonly PropertyData FirstNameProperty = RegisterProperty("FirstName", typeof(string));
 
 public static readonly PropertyData LastNameProperty = RegisterProperty("LastName", typeof(string));
 
 public static readonly PropertyData MiddleNameProperty = RegisterProperty("MiddleName", typeof(string));
 
 public string FirstName
 {
            get { return  this.GetValue<string>(FirstNameProperty); }
            set { this.SetValue(FirstNameProperty, value);  }
 }
 
 public string LastName
 {
            get { return this.GetValue<string>LastNameProperty); }
            set { this.SetValue(LastNameProperty, value); }
 }
 
 public string MiddleName
 {
            get { return this.GetValue<string>(MiddleNameProperty); }
            set { this.SetValue(MiddleNameProperty, value); }
 }
}

As you could be noticed, there is an implementation pattern that should be fully automated. In fact, every Catel version comes with a code snippets package that assist you to write down this class from scratch.

But now, Catel team comes with a new tool. Using the R# SDK, we implement a R# extension that cover the Catel coding workflow and we named CatelR# (obviously).

Now you can do this


You can also do it faster with the R# generation options (Alt + Ins)


The   beta  version,  of CatelR#,  is  released. You can read more about CatelR# and download the beta. We are expecting for your feedback and new features request.

Enjoy it, and have nice coding experience with CatelR#.

Thursday, April 19, 2012

Introduction

I was writing a couple of features of a new tool for Catel developers and users, and Geert advised me to write about this experience.

Then I noticed that I have no place where could do it and just created this blog, applied the simple theme, in the orange fashion, and started to write these lines.

Btw, the orange color is about my favorite baseball team Villa Clara, also known as the explosive oranges.

So, what will you find on this blog in the future?

Actually, I'm a software engineer since 2005 and daily I interacts with friends (or not), sharing (or discussing) about experiences in term of software development practices, including wide range of topics such as:
  • Well coding practices, write code semantically right vs. just "syntactically" right.
  • Continuous integration, building, testing and deploying (devops).
  • Synchronization of version control and issue tracker systems.
  • Multithreading.
  • Automation of common or repetitive development tasks.
  • Version control systems and extreme synchronization scenarios. 
  • IoC, reflection, type descriptors, dynamic proxies, wavers.
and more...

This blog is about the software development. Yes, you heard well, this is just another blog about software development, but with a small difference. Here I will tell you the history just "like was told to me".

Ah, what about the new tool for Catel developers and user?  Expect news about it here or here, it will come soon and would be great ;).

X-ray StoneAssemblies.MassAuth with NDepend

Introduction A long time ago, I wrote this post  Why should you start using NDepend?  which I consider as the best post I have ever...